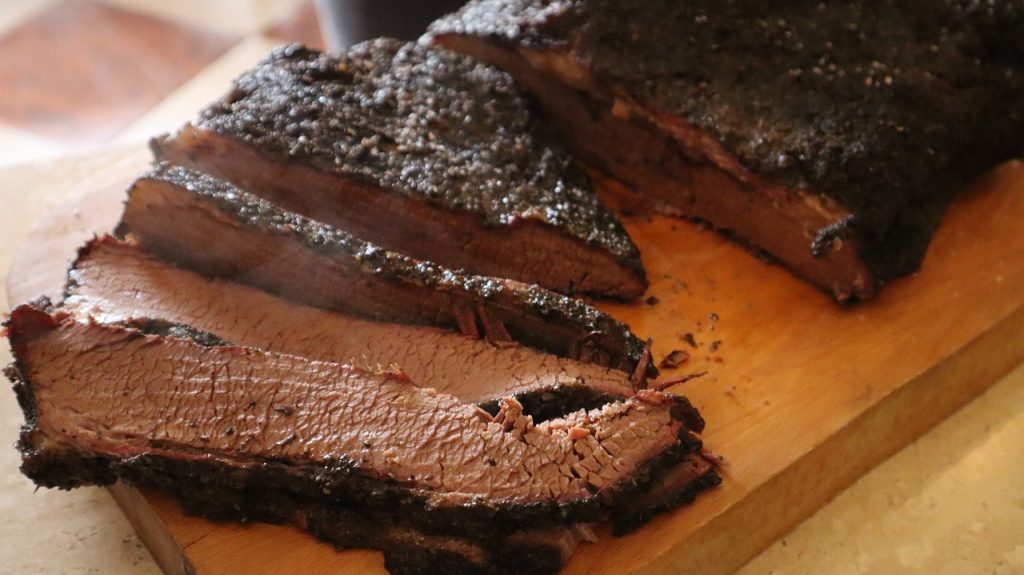
When it comes to cooking tri-tip, the reverse-sear method on a pellet smoker is an unbeatable approach to achieving a tender, juicy, and perfectly cooked piece of meat. This method allows you to infuse the meat with a smoky flavor while maintaining control over the final sear. Whether you’re a barbecue enthusiast or a casual griller, this guide will walk you through everything you need to know about reverse-searing tri-tip on a pellet smoker.

Table of Contents
- Choosing the Right Tri-Tip Cut
- Step-by-Step Guide to Reverse-Seared Tri-Tip
- 1. Dry Brine Your Tri-Tip
- 2. Preheat Your Pellet Smoker
- 3. Smoking the Tri-Tip
- 4. The Sear: Finishing the Perfect Tri-Tip
- Serving and Enjoying Your Tri-Tip
- Pairing Your Tri-Tip with Sides and Sauces
- Tips for Perfecting Your Reverse-Seared Tri-Tip
- FAQs on Reverse-Seared Tri-Tip
What is Reverse-Seared Tri-Tip?
The reverse-sear method is a cooking technique that involves cooking the meat at a low temperature first, allowing it to cook evenly throughout, and then finishing it off with a high-temperature sear. This technique creates a stunning crust on the outside while keeping the inside tender and juicy. This method works especially well for tri-tip, a triangular cut from the bottom sirloin that has a rich, beefy flavor and a tender texture when cooked properly.
Key benefits of reverse-searing:
- Even cooking: It eliminates the gray overcooked band found in traditional grilling methods.
- Enhanced smoky flavor: The long, low cooking time allows for deeper flavor absorption.
- Perfect crust: The final sear creates a beautifully browned exterior that contrasts with the juicy interior.
Why Use a Pellet Smoker?
Pellet smokers are ideal for reverse-searing as they offer precise temperature control and steady, indirect heat. The pellets add a distinct smoky flavor to the meat, enhancing the rich, natural flavor of tri-tip. Additionally, with a pellet smoker, you can easily transition from a low smoke to a high-temperature sear.
Advantages of using a pellet smoker:
- Consistent heat control: This feature is crucial for slow cooking without drying out the meat.
- Versatile wood options: You can choose from various wood pellets (like hickory, mesquite, or cherry) to tailor the flavor profile.
- Convenience: Pellet smokers are easy to operate, allowing you to focus on seasoning and preparation without constantly managing the heat.
Choosing the Right Tri-Tip Cut
When selecting a tri-tip, quality is essential. Look for a well-marbled cut with a good fat cap, as this helps to keep the meat moist during the cooking process. A typical tri-tip weighs between 2.5 and 3.5 pounds, making it an ideal size for reverse-searing on a pellet smoker.
Tips for picking the best tri-tip:
- Marbling: Look for visible fat veins throughout the meat. More marbling generally indicates better flavor and tenderness.
- Freshness: Bright red color and firm texture indicate freshness. Avoid any meat that appears dull or has excessive liquid in the packaging.
- Fat Cap: A good layer of fat on one side will help baste the meat as it cooks, adding flavor and moisture.
Step-by-Step Guide to Reverse-Seared Tri-Tip
Ready to get started? Follow these steps for a perfect reverse-seared tri-tip every time.
Step 1: Dry Brine Your Tri-Tip
Dry brining is an essential first step for enhancing the flavor and tenderness of your tri-tip. This involves coating the meat in kosher salt and letting it rest for a couple of hours.
- How to Dry Brine: Sprinkle kosher salt over all sides of the tri-tip, using about half a teaspoon of salt per pound of meat.
- Resting Time: Allow the tri-tip to rest uncovered in the fridge for 1-2 hours (or even overnight for deeper flavor). This process helps to draw moisture into the meat and improves its overall texture.
Tip: Don’t rinse the salt off; it will absorb into the meat, adding flavor and promoting a nice crust.
Step 2: Preheat Your Pellet Smoker
Preheat your pellet smoker to a low temperature of 180°F. The low temperature is key for imparting that smoky flavor and cooking the tri-tip slowly and evenly.
- Temperature: Set your smoker to 180°F for the initial smoke.
- Pellet Choice: Use pellets like oak or hickory for a robust smoky flavor, or try fruitwoods like cherry for a milder, sweeter taste.
Step 3: Smoking the Tri-Tip
Place the tri-tip on the smoker with the fat cap facing up. This allows the fat to render down through the meat, keeping it juicy and flavorful.
- Cook Time: Smoke the tri-tip for about 1.5 to 2 hours, or until the internal temperature reaches 110°F.
- Temperature Monitoring: Use a meat thermometer to keep track of the internal temperature for accurate cooking. This ensures that the meat cooks evenly without overcooking.
Tip: Resist the urge to open the smoker too often, as this can release heat and smoke. Trust the process for consistent results.
Step 4: The Sear – Finishing the Perfect Tri-Tip
Once the tri-tip reaches an internal temperature of 110°F, it’s time for the final sear. Remove the tri-tip from the smoker, cover it loosely with foil, and let it rest while you increase the smoker or a grill to a high temperature (450°F – 500°F).
- High Heat Sear: Sear the tri-tip for about 2-3 minutes per side, or until it develops a beautiful brown crust. This step locks in juices and enhances the flavor.
- Internal Temperature: Aim for 125°F for rare, 135°F for medium-rare, and 145°F for medium. Use an instant-read thermometer to check the temperature accurately.
Tip: Rest the tri-tip for 5-10 minutes after searing. This allows the juices to redistribute, ensuring a juicy bite every time.
Serving and Enjoying Your Tri-Tip
After the final rest, slice the tri-tip against the grain. Cutting against the grain will yield tender, bite-sized pieces that are easier to chew.
Serving Ideas:
- Serve with classic barbecue sides like coleslaw, roasted potatoes, or a fresh salad. A side of grilled vegetables also pairs beautifully.
- Slice thinly and use in sandwiches or tacos for a versatile meal. Tri-tip is perfect in a hearty sandwich with some horseradish sauce or barbecue sauce.
- Pair with a smoky barbecue sauce or chimichurri for added flavor. These sauces complement the richness of the meat, enhancing its taste.
Storage Tips: Any leftovers can be stored in an airtight container in the fridge for up to 3 days. Tri-tip also freezes well, so consider freezing slices for a quick meal later. Just ensure it’s wrapped tightly to prevent freezer burn.
Pairing Your Tri-Tip with Sides and Sauces
To elevate your tri-tip meal, consider serving it with complementary sides and sauces. Here are some great pairings:
Recommended Sides:
- Grilled Corn on the Cob: The sweetness of corn complements the savory flavors of the tri-tip.
- Roasted Brussels Sprouts: Their slight bitterness balances the richness of the meat.
- Garlic Mashed Potatoes: Creamy mashed potatoes are a classic pairing, absorbing the juices from the meat.
- Coleslaw: A tangy slaw adds crunch and freshness to the plate.
Delicious Sauces:
- Chimichurri Sauce: This fresh herb sauce adds brightness and a herby kick to your tri-tip.
- Barbecue Sauce: A sweet and smoky sauce enhances the meat’s natural flavors.
- Horseradish Cream Sauce: The sharpness of horseradish adds a zesty contrast that works beautifully with beef.
Tips for Perfecting Your Reverse-Seared Tri-Tip
To ensure you get the best results every time, consider these tips:
- Invest in a good meat thermometer: Precision is key in cooking, especially when it comes to steak. An instant-read thermometer will help you avoid overcooking.
- Experiment with different woods: Each type of wood will impart a unique flavor to your meat. Don’t hesitate to try different wood pellets to discover your favorite flavor combinations.
- Let your meat rest: Resting the meat after cooking is crucial for juicy results. It allows the juices to redistribute, making every bite tender and flavorful.
- Practice your slicing technique: Proper slicing is essential for maximizing tenderness. Always cut against the grain and use a sharp knife for the best results.
FAQs on Reverse-Seared Tri-Tip
Q: How long should I smoke tri-tip on a pellet smoker?
A: Typically, smoking tri-tip to an internal temperature of 110°F takes around 1.5 to 2 hours. However, cook time can vary based on the size and thickness of the tri-tip. Always use a meat thermometer for accuracy.
Q: What’s the best wood for smoking tri-tip?
A: Popular wood choices include oak and hickory for a rich, smoky flavor, but fruitwoods like cherry or apple can offer a sweeter note that complements the beef nicely.
Q: Can I reverse-sear tri-tip in the oven?
A: Yes! If you don’t have a pellet smoker, you can use an oven at a low temperature to cook the tri-tip, then sear it in a hot skillet or grill for the finishing touch.
Q: What temperature is best for searing?
A: Aim for a temperature between 450°F and 500°F for the best sear. This high heat will create a delicious crust while keeping the inside juicy.
Conclusion
Reverse-seared tri-tip on a pellet smoker is a straightforward yet rewarding cooking method that yields mouthwatering results. With this comprehensive guide, you can enjoy the satisfaction of preparing a restaurant-quality steak right at home. Remember to experiment with flavors, perfect your technique, and savor the delicious rewards of your efforts. Happy grilling!
Reverse Seared Tri-Tip on a Pellet Smoker: The Perfect Guide to a Juicy, Flavorful Steak
Description
This reverse-seared tri-tip on a pellet smoker is a culinary delight that combines the rich, smoky flavors of low-and-slow cooking with a perfectly seared crust. Ideal for family gatherings or a weekend barbecue, this recipe will have everyone asking for seconds!


